Author

Francis Ndungu
On this Page
How to Install React and Next.js on Ubuntu 26.04
07 May, 2026
Introduction
React is a free, open-source JavaScript library for building user interfaces, particularly single-page applications where data changes over time. Developed and maintained by Meta, React uses a component-based architecture that allows developers to encapsulate behavior and presentation into reusable pieces, making large applications easier to build and maintain. Next.js builds on top of React by adding server-side rendering, static site generation, and file-based routing, transforming React from a client-only library into a full-stack framework. The React ecosystem relies on Node.js and NPM (Node Package Manager) to run development servers, manage dependencies, and build production bundles.
This guide teaches you how to install React and Next.js on Ubuntu 26.04 by creating a new Next.js project using the official Create Next App tool and running a development server.
Prerequisites
Before you start:
- Purchase an Ubuntu 26.04 VPS (Virtual Private Server) . If you don't have an Ubuntu VPS, sign up with Vultr and get upto $300 worth of free credit to test the Vultr platform.
-
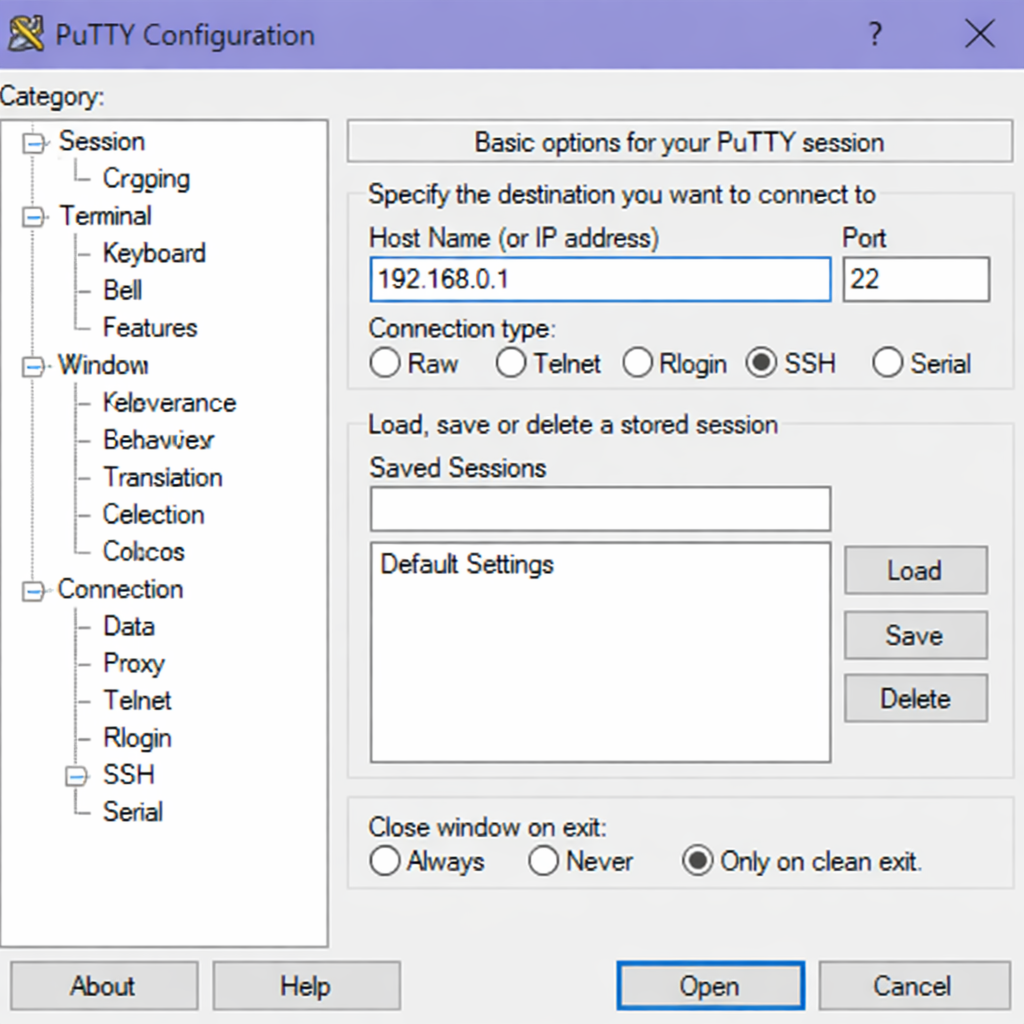
Connect to your server through SSH, replace
192.168.0.1with your VPS public IP address..-
Use PuTTY to connect to your VPS .
-
Run the following command in your shell.
console$ ssh username@192.168.0.1
-
-
Create a non-root user with sudo privileges. Read our guide on How to Create a Non-Root Sudo User on Ubuntu 24.04. You'll use this user's account to run the commands in this guide.
- Install Node.js and NPM on Ubuntu 26.04 by following our guide on How to Install Node.js and NPM on Ubuntu 26.04.
Install Next.js Using Create Next App
Create Next App is the official tool that scaffolds a new Next.js project with all necessary configurations, including TypeScript support, ESLint for code linting, and Tailwind CSS for styling.
-
Create a new Next.js application named
nextjs-demousing the official create-next-app tool.console$ npx create-next-app@latest nextjs-demoOutput:
Need to install the following packages: create-next-app@14.2.5 OK to proceed? (y) -
Press Y then Enter to confirm installation.
-
When prompted, select the following options for your Next.js project:
Would you like to use TypeScript? … No / Yes
Would you like to use ESLint? … No / Yes
Would you like to use Tailwind CSS? … No / Yes
Would you like to use `src/` directory? … No / Yes
Would you like to use App Router? (recommended) … No / Yes
Would you like to customize the default import alias (@/*)? … No / Yes
Output:
Creating a new Next.js app in /home/username/nextjs-demo Installing dependencies: - next - react - react-dom - eslint - eslint-config-next - tailwindcss - postcss - autoprefixer added 352 packages in 1m Success! Created nextjs-demo at /home/username/nextjs-demo -
Navigate into the new Next.js project directory.
console$ cd nextjs-demo
Explore the Next.js Project Structure
Understanding the default Next.js structure helps you locate where to write components and configure routing.
-
List all files and directories in your Next.js project.
console$ ls -laOutput:
total 420
drwxr-xr-x  7 username username   4096 Mar 15 14:30 .
drwxr-xr-x  4 username username   4096 Mar 15 14:30 ..
-rw-r--r--  1 username username    293 Mar 15 14:30 .eslintrc.json
-rw-r--r--  1 username username     78 Mar 15 14:30 .gitignore
drwxr-xr-x  3 username username   4096 Mar 15 14:30 .next
-rw-r--r--  1 username username    280 Mar 15 14:30 README.md
drwxr-xr-x  2 username username   4096 Mar 15 14:30 app
-rw-r--r--  1 username username    482 Mar 15 14:30 next.config.mjs
-rw-r--r--  1 username username   120k Mar 15 14:30 package-lock.json
-rw-r--r--  1 username username    618 Mar 15 14:30 package.json
drwxr-xr-x  2 username username   4096 Mar 15 14:30 postcss.config.mjs
drwxr-xr-x  2 username username   4096 Mar 15 14:30 public
drwxr-xr-x  2 username username   4096 Mar 15 14:30 tailwind.config.js
Run the Next.js Development Server
Start the development server to see your Next.js application running with hot reloading, which automatically updates the browser when you save file changes.
-
Start the Next.js development server on the default port 3000.
console$ npm run devOutput:
> nextjs-demo@0.1.0 dev
> next dev

▲ Next.js 14.2.5
- Local:        http://localhost:3000
- Environments: .env.local

✓ Ready in 2.3s
Press Ctrl + C to stop the development server.
Create a Custom Component in Next.js
Build a new page component to understand how file-based routing works in Next.js, where each file inside the app directory becomes a route.
-
Create a new
aboutdirectory inside theappfolder.console$ mkdir app/about -
Create a new
page.jsfile inside theapp/aboutdirectory.console$ nano app/about/page.js -
Add the following React component code to create an about page.
JavaScriptexport default function AboutPage() { return ( <main className="flex min-h-screen flex-col items-center justify-center p-24"> <h1 className="text-4xl font-bold mb-8">About Next.js on Ubuntu</h1> <p className="text-xl text-gray-600 mb-4"> This Next.js application runs on Ubuntu 26.04. </p> <p className="text-lg text-gray-500"> Next.js provides server-side rendering and static site generation for React applications. </p> </main> ); } -
Save and close the
app/about/page.jsfile by pressing Ctrl + X, Y then Enter. -
Start the development server again.
console$ npm run dev -
Open your web browser and navigate to
http://localhost:3000/aboutto see the new about page.Output in terminal:
GET /about 200 in 45ms
Press Ctrl + C to stop the development server.
Build the Next.js Application for Production
Create an optimized production build of your Next.js application that pre-renders pages when possible and generates static assets.
-
Generate the production build inside the
.nextdirectory.console$ npm run buildOutput:
> nextjs-demo@0.1.0 build
> next build

▲ Next.js 14.2.5

Creating an optimized production build ...
✓ Compiled successfully
✓ Linting and checking validity of types
✓ Collecting page data
✓ Generating static pages (4/4)
✓ Collecting build traces
✓ Finalizing page optimization

Route (app)                              Size     First Load JS
┌ ○ /                                    5.2 kB         87.5 kB
├ ○ /about                               1.2 kB         83.5 kB
└ ○ /_not-found                          885 B          83.1 kB
+ First Load JS shared by all            82.2 kB

○  (Static)  automatically rendered as static HTML (uses no initial props)

✓ Production build completed in 5.3s
Start the Next.js Production Server
After building your application, start the production server to serve optimized content with better performance than the development server.
-
Start the Next.js production server on port 3000.
console$ npm startOutput:
> nextjs-demo@0.1.0 start
> next start

▲ Next.js 14.2.5
- Local:        http://localhost:3000
- Environments: .env.local

✓ Ready in 481ms
Press Ctrl + C to stop the production server.
Conclusion
In this guide, you have installed Next.js on Ubuntu 26.04 using Create Next App, explored the default project structure, run the development server with hot reloading, created a custom about page using file-based routing, built an optimized production bundle, and started the production server. Now that you have Next.js running on Ubuntu, consider deploying your Next.js application to Vercel for automatic scaling or explore adding authentication with NextAuth.js and database integration with Prisma to build full-stack web applications.
