Author

Francis Ndungu
On this Page
How to Install Python and PIP on Ubuntu 26.04
07 May, 2026
Introduction
Python is a high-level, interpreted programming language known for its readable syntax and versatile application across web development, data science, automation, and artificial intelligence. Unlike compiled languages that require explicit translation to machine code, Python executes code line by line, which accelerates development cycles and simplifies debugging. The language's extensive standard library provides ready-to-use modules for common tasks, from file handling to network communication. PIP (Pip Installs Packages) serves as Python's package manager, allowing developers to install and manage thousands of third-party libraries from the Python Package Index (PyPI).
This guide shows you how to install Python 3 and PIP on Ubuntu 26.04 and configure a virtual environment for project-specific dependency management.
Prerequisites
Before you start:
- Purchase an Ubuntu 26.04 VPS (Virtual Private Server) . If you don't have an Ubuntu VPS, sign up with Vultr and get upto $300 worth of free credit to test the Vultr platform.
-
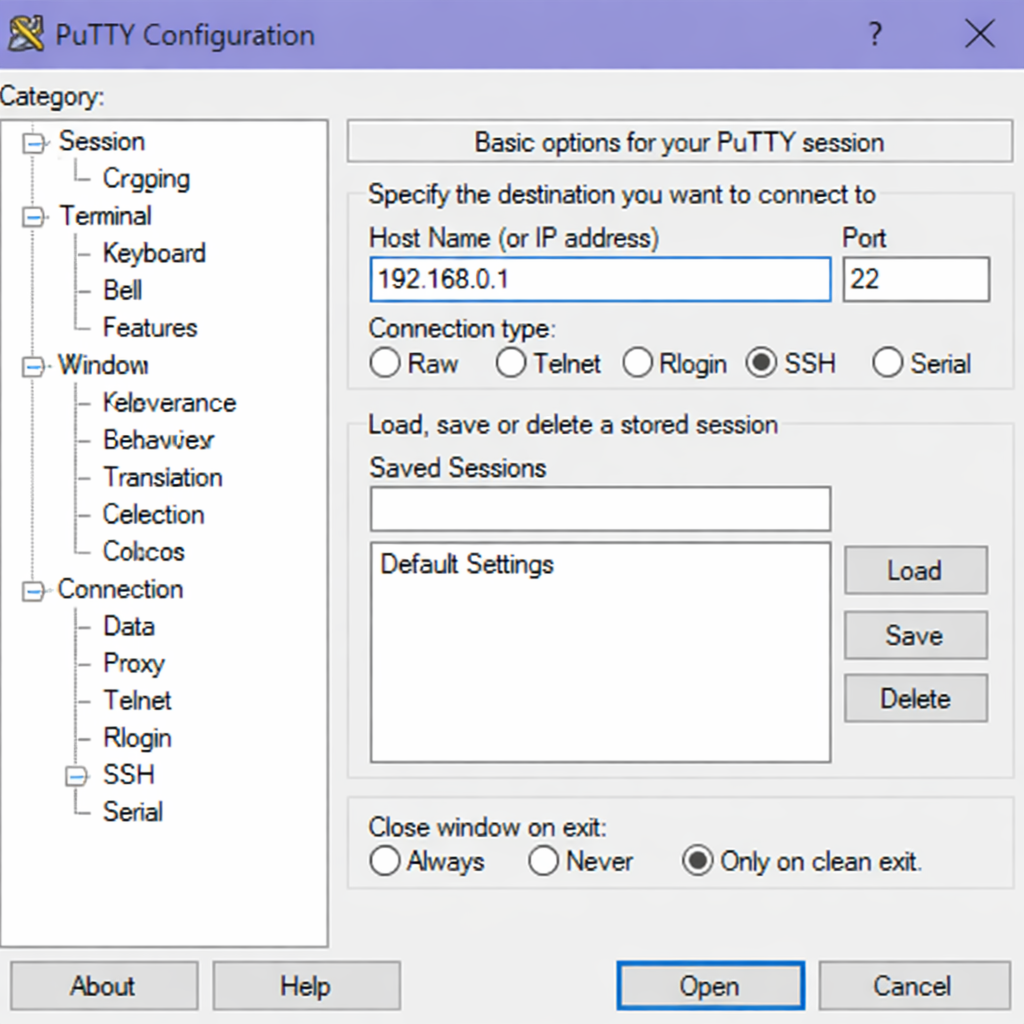
Connect to your server through SSH, replace
192.168.0.1with your VPS public IP address..-
Use PuTTY to connect to your VPS .
-
Run the following command in your shell.
console$ ssh username@192.168.0.1
-
-
Create a non-root user with sudo privileges. Read our guide on How to Create a Non-Root Sudo User on Ubuntu 24.04. You'll use this user's account to run the commands in this guide.
Update System Package Information
Before installing new software, refresh your system's package index to ensure you pull the latest available versions from Ubuntu repositories.
-
Update the package list from all configured repositories.
console$ sudo apt updateOutput:
Hit:1 http://archive.ubuntu.com/ubuntu noble InRelease
Get:2 http://archive.ubuntu.com/ubuntu noble-updates InRelease
Get:3 http://archive.ubuntu.com/ubuntu noble-security InRelease
Reading package lists... Done
Install Python
Ubuntu 26.04 comes with Python pre-installed, but you may need to ensure you have the latest version or install Python if it is missing.
-
Check if Python is already installed on your system.
console$ python3 --versionOutput:
Python 3.14.4If the above command shows an error:
-
Install Python using the following command. The
python3package installs the latest stable Python version available in Ubuntu repositories.console$ sudo apt install -y python3Output:
Reading package lists... Done
Building dependency tree... Done
Reading state information... Done
python3 is already the newest version (3.12.3-0ubuntu1).
0 upgraded, 0 newly installed, 0 to remove and 0 not upgraded.
-
-
Install
python3-venv, apackage that allows you to create virtual environment. This package provides the tools to create isolated Python environments for different projects.console$ sudo apt install -y python3-venvOutput:
Reading package lists... Done
Building dependency tree... Done
Reading state information... Done
The following NEW packages will be installed:
  python3-venv
0 upgraded, 1 newly installed, 0 to remove and 0 not upgraded.
Need to get 1,024 B of archives.
After this operation, 5,120 B of additional disk space will be used.
Install PIP
Python 3 installations on Ubuntu often include PIP, but you may need to install it separately as a standalone package.
-
Check if PIP is already available on your system.
console$ pip3 --versionOutput:
pip 25.1.1 from /usr/lib/python3/dist-packages/pip (python 3.14)If the above command shows an error:
-
Install PIP using the package manager.
console$ sudo apt install -y python3-pipOutput:
Reading package lists... Done
Building dependency tree... Done
Reading state information... Done
The following NEW packages will be installed:
  python3-pip
0 upgraded, 1 newly installed, 0 to remove and 0 not upgraded.
Need to get 1,200 kB of archives.
After this operation, 4,500 kB of additional disk space will be used.
-
Create and Activate a Virtual Environment
Virtual environments isolate project dependencies, preventing conflicts between different Python projects that may require different package versions. This practice represents standard Python development workflow.
-
Create a new directory for your Python project.
console$ mkdir python-demo -
Navigate into the new project directory.
console$ cd python-demo -
Create a new virtual environment named
venvinside your project directory.console$ python3 -m venv venv -
Activate the virtual environment.
console$ source venv/bin/activate -
Verify that your active Python environment uses the virtual environment's interpreter.
console(venv) $ which python3Output:
/home/your_username/python-demo/venv/bin/python3
Notice that your shell prompt now shows (venv) before the regular prompt, indicating your active Python environment.
Install Python Packages with PIP
With your virtual environment active, install some popular Python packages to test PIP functionality.
-
Install the
requestslibrary. This package simplifies making HTTP requests to web servers and APIs.console(venv) $ pip install requestsOutput:
Collecting requests Downloading requests-2.32.3-py3-none-any.whl (64 kB) Collecting charset_normalizer Downloading charset_normalizer-3.4.1-cp312-cp312-manylinux_2_17_x86_64.manylinux2014_x86_64.whl (149 kB) Collecting urllib3 Downloading urllib3-2.4.0-py3-none-any.whl (128 kB) Installing collected packages: urllib3, charset_normalizer, requests Successfully installed charset_normalizer-3.4.1 requests-2.32.3 urllib3-2.4.0 -
List all active packages in your active Python environment and confirm that the
requestslibrary exists.console(venv) $ pip listOutput:
Package Version ------------------ --------- charset-normalizer 3.4.1 pip 25.0.1 requests 2.32.3 urllib3 2.4.0 -
Generate a requirements file that captures all packages and their versions. This file allows others to recreate the exact same environment.
console(venv) $ pip freeze > requirements.txt -
Display the contents of the generated requirements file.
console(venv) $ cat requirements.txtOutput:
charset-normalizer==3.4.1
requests==2.32.3
urllib3==2.4.0
Create a Test Python Application
Build a simple Python script that uses the installed requests library to fetch data from a public API.
-
Create a new
api_demo.pyfile using the nano text editor.console(venv) $ nano api_demo.py -
Add the following Python code to fetch and display a random joke from an online API.
Pythonimport requests def fetch_random_joke(): url = 'https://official-joke-api.appspot.com/random_joke' try: response = requests.get(url) response.raise_for_status() joke_data = response.json() print(f"Here's a random joke for you:") print(f"Question: {joke_data['setup']}") print(f"Punchline: {joke_data['punchline']}") except requests.exceptions.RequestException as error: print(f"Failed to fetch joke: {error}") if __name__ == '__main__': fetch_random_joke() -
Save and close the
api_demo.pyfile by pressing Ctrl + X, Y then Enter. -
Run the Python script to test your environment.
console(venv) $ python3 api_demo.pyOutput:
Here's a random joke for you:
Question: What do you call a fake noodle?
Punchline: An impasta.
Your Python environment works correctly with third-party packages.
Deactivate the Virtual Environment
When you finish working on a project, deactivate the virtual environment to return to your system's global Python environment.
-
Exit the virtual environment.
console(venv) $ deactivate -
Verify that you have left the virtual environment by checking that
(venv)no longer appears in your prompt.console$ which python3Output:
/usr/bin/python3
Conclusion
In this guide, you have installed Python 3 and PIP on Ubuntu 26.04, created and activated a virtual environment for dependency isolation, installed third-party packages using PIP, and built a functional Python script that consumes a web API. Now that you have Python configured properly, consider exploring web frameworks like Fast API, Django, Flask to build full-stack applications, or dive into data science libraries such as NumPy and Pandas for data analysis projects.
