Author

Laura Thomas
On this Page
How to Install PostgreSQL Database Server on Ubuntu 26.04
26 Apr, 2026
Introduction
PostgreSQL is a free, open-source relational database management system that offers advanced features and supports many modern programming languages like Python, Java, C++, PHP, Golang, and Node.js. The database server handles flexible data types and supports different operating systems. These features make PostgreSQL a powerful and versatile choice for developers and businesses.
This guide shows you how to install PostgreSQL on Ubuntu 26.04.
Prerequisites
Before you start:
- Purchase an Ubuntu 24.04 VPS (Virtual Private Server) . If you don't have an Ubuntu VPS, sign up with Vultr and get upto $300 worth of free credit to test the Vultr platform.
-
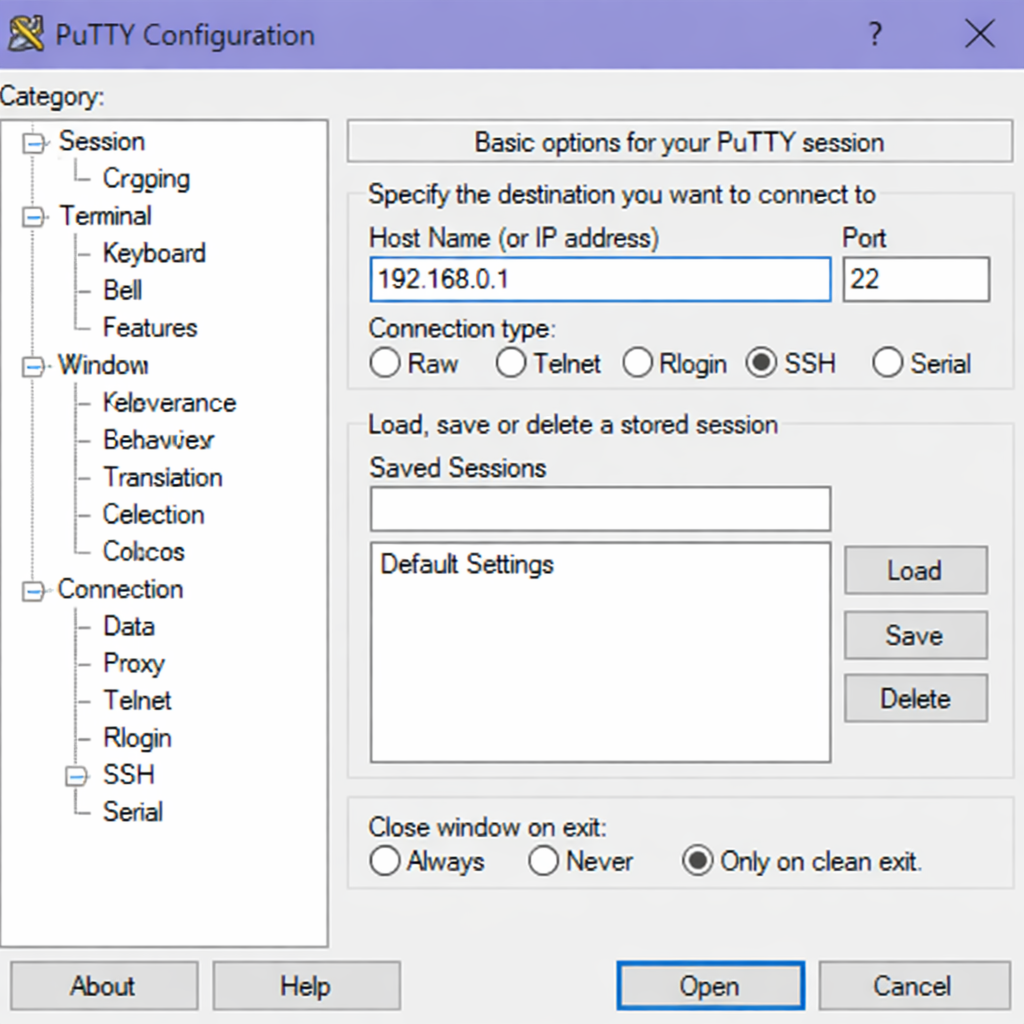
Connect to your server through SSH, replace
192.168.0.1with your VPS public IP address..-
Use PuTTY to connect to your VPS .
-
Run the following command in your shell.
console$ ssh username@192.168.0.1
-
-
Create a non-root user with sudo privileges. Read our guide on How to Create a Non-Root Sudo User on Ubuntu 24.04. You'll use this user's account to run the commands in this guide.
Install PostgreSQL
The PostgreSQL package is available by default on the Ubuntu repositories. To install the package, follow these steps.
-
Refresh your system's package list to ensure you get the latest available versions.
console$ sudo apt update -
Install the PostgreSQL package and the required dependencies.
console$ sudo apt install -y postgresql postgresql-contribOutput:
Reading package lists... Done Building dependency tree... Done Reading state information... Done The following additional packages will be installed: libcommon-sense-perl libjson-perl libjson-xs-perl libllvm19 libpq5 libtypes-serialiser-perl postgresql-18 postgresql-client-18 postgresql-client-common postgresql-common Suggested packages: postgresql-doc The following NEW packages will be installed: libcommon-sense-perl libjson-perl libjson-xs-perl libllvm19 libpq5 libtypes-serialiser-perl postgresql postgresql-18 postgresql-client-18 postgresql-client-common postgresql-contrib postgresql-common 0 upgraded, 12 newly installed, 0 to remove and 0 not upgraded. Need to get 41.2 MB of archives. After this operation, 231 MB of additional disk space will be used. -
Verify the PostgreSQL version using the
psqlclient, an interactive command‑line tool that ships with PostgreSQL.console$ psql --versionOutput:
psql (PostgreSQL) 18.3 (Ubuntu 18.3-1)
Manage PostgreSQL Service
PostgreSQL runs as a system service on Ubuntu under the name postgresql. You can manage this service by using specific commands to start, stop, restart, and check the PostgreSQL status. These commands ensure your PostgreSQL server runs smoothly and make maintenance easier on your system.
Check PostgreSQL Status
$ sudo systemctl status postgresql
Output:
● postgresql.service - PostgreSQL RDBMS
     Loaded: loaded (/usr/lib/systemd/system/postgresql.service; enabled; preset: enabled)
     Active: active (exited) since Tue 2026-03-10 10:15:23 UTC; 5min 12s ago
    Process: 1143 ExecStart=/bin/true (code=exited, status=0/SUCCESS)
   Main PID: 1143 (code=exited, status=0/SUCCESS)
        CPU: 2ms
Press Ctrl + C to return to the shell prompt
Enable PostgreSQL to Start on Boot
$ sudo systemctl enable postgresql
Output:
Synchronizing state of postgresql.service with SysV service script with /usr/lib/systemd/systemd-sysv-install.
Executing: /usr/lib/systemd/systemd-sysv-install enable postgresql
Start PostgreSQL Service
$ sudo systemctl start postgresql
Stop PostgreSQL Service
$ sudo systemctl stop postgresql
Restart PostgreSQL Service
$ sudo systemctl restart postgresql
Secure PostgreSQL Database Server
By default, you can log in to your PostgreSQL server using the postgres user account without a password on your localhost. To secure the postgres user account with a password, follow the steps below.
-
Log in to the PostgreSQL server.
console$ sudo -u postgres psqlOutput:
psql (18.2 (Ubuntu 18.2-1ubuntu1)) Type "help" for help. postgres=# -
Change the password for the postgres user.
postgresqlpostgres=# \password postgresOutput:
Enter new password: your_password_here Enter it again: your_password_here -
Log out from the PostgreSQL server.
postgresqlpostgres=# \qOutput:
$ -
Open the main PostgreSQL client authentication configuration file.
console$ sudo nano /etc/postgresql/18/main/pg_hba.conf -
Locate the
administrative logindirective.INI# Database administrative login by Unix domain socket local all postgres peer # TYPE DATABASE USER ADDRESS METHOD -
Change
peertomd5.INI# Database administrative login by Unix domain socket local all postgres md5 # TYPE DATABASE USER ADDRESS METHOD -
Save and close the
/etc/postgresql/18/main/pg_hba.conffile by pressing Ctrl + X, Y then Enter. -
Restart the PostgreSQL service to load the new security changes.
console$ sudo systemctl restart postgresql
Test the PostgreSQL Database Server
In this section, you'll test PostgreSQL by logging into the database server, creating a sample database and table, inserting some data, and querying the table to ensure everything functions correctly.
-
Log in to the PostgreSQL server as
postgresuser and enter the password you defined.console$ sudo -u postgres psqlOutput:
Password: your_password_here psql (18.2 (Ubuntu 18.2-1ubuntu1)) Type "help" for help. postgres=# -
Create a new
company_dbdatabase.postgresqlpostgres=# CREATE DATABASE company_db;Output:
CREATE DATABASE -
List all databases and ensure
company_dbappears in the list.postgresqlpostgres=# \lOutput:
postgresqlList of databases Name | Owner | Encoding | Locale Provider | Collate | Ctype | Access privileges -----------+----------+----------+-----------------+---------+---------+------------------- company_db | postgres | UTF8 | libc | C.UTF-8 | C.UTF-8 | postgres | postgres | UTF8 | libc | C.UTF-8 | C.UTF-8 | template0 | postgres | UTF8 | libc | C.UTF-8 | C.UTF-8 | =c/postgres + | | | | | | postgres=CTc/postgres template1 | postgres | UTF8 | libc | C.UTF-8 | C.UTF-8 | =c/postgres + | | | | | | postgres=CTc/postgres (4 rows) -
Press Q to exit from the list.
-
Connect to the new
company_db.postgresqlpostgres=# \c company_db;Output:
You are now connected to database "company_db" as user "postgres". company_db=# -
Create a sample
employeestable.postgresqlcompany_db=# CREATE TABLE employees ( employee_id SERIAL PRIMARY KEY, full_name VARCHAR(100), email VARCHAR(255) );Output:
CREATE TABLE -
Populate the
employeestable with sample records.postgresqlcompany_db=# INSERT INTO employees(full_name, email) VALUES ('MARY ROE', 'mary_roe@example.com'), ('JAY SMITH', 'jay_smith@example.com'), ('ANNA KIM', 'anna_kim@example.com');Output:
INSERT 0 3 -
Query the
employeestable to verify the records.postgresqlcompany_db=# SELECT employee_id, full_name, email FROM employees;Output:
postgresqlemployee_id | full_name | email ------------+-----------+----------------------- 1 | MARY ROE | mary_roe@example.com 2 | JAY SMITH | jay_smith@example.com 3 | ANNA KIM | anna_kim@example.com (3 rows) -
Exit from the PostgreSQL prompt.
postgresqlcompany_db=# \q
Your PostgreSQL database server is working as expected.
Conclusion
In this guide, you have installed PostgreSQL on Ubuntu 26.04 using apt, secured the database server with a password, and created a sample database with tables and records. Now that you have PostgreSQL running, consider integrating the database with a programming language like Python using psycopg2 or with Node.js using the pg package to build data-driven applications.
