Author

Francis Ndungu
On this Page
How to Install MySQL Database Server on Ubuntu 26.04
26 Apr, 2026
Introduction
MySQL is a free, open-source relational database management system that stores and organizes data in structured tables with rows and columns. Many web applications, content management systems like WordPress, and e-commerce platforms use MySQL as their backend database. The database server supports ACID (Atomicity, Consistency, Isolation, Durability) compliance, transactions, and replication, making it suitable for both small projects and large-scale enterprise applications.
This guide teaches you how to install MySQL on Ubuntu 26.04.
Prerequisites
Before you start:
- Purchase an Ubuntu 24.04 VPS (Virtual Private Server) . If you don't have an Ubuntu VPS, sign up with Vultr and get upto $300 worth of free credit to test the Vultr platform.
-
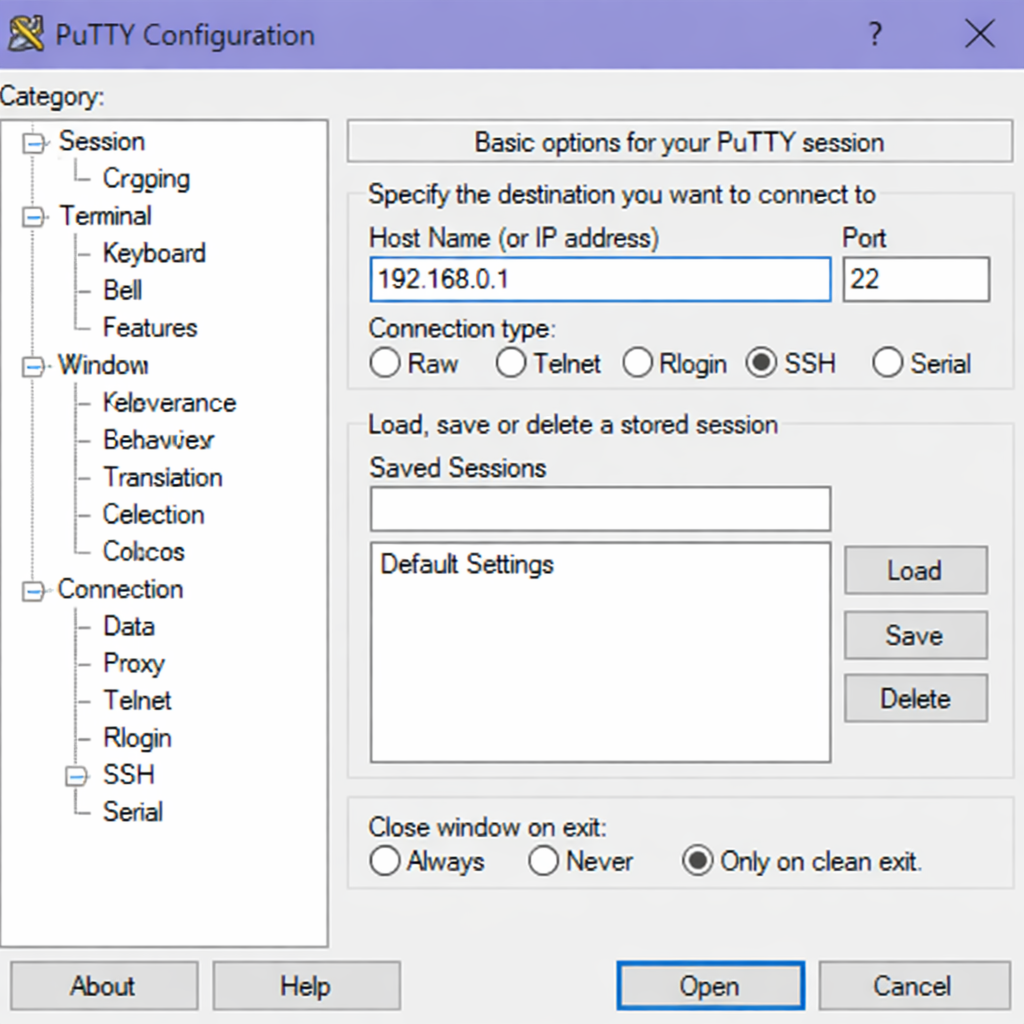
Connect to your server through SSH, replace
192.168.0.1with your VPS public IP address..-
Use PuTTY to connect to your VPS .
-
Run the following command in your shell.
console$ ssh username@192.168.0.1
-
-
Create a non-root user with sudo privileges. Read our guide on How to Create a Non-Root Sudo User on Ubuntu 24.04. You'll use this user's account to run the commands in this guide.
Install MySQL Server
The MySQL package is available by default on the Ubuntu repositories. To install the package, follow these steps.
-
Refresh your system's package list to ensure you get the latest available versions.
console$ sudo apt update -
Install the MySQL server package and the required dependencies.
console$ sudo apt install -y mysql-serverOutput:
Reading package lists... Done Building dependency tree... Done Reading state information... Done The following additional packages will be installed: libaio1 libcgi-fast-perl libcgi-pm-perl libencode-locale-perl libevent-core-2.1-7 libfcgi-bin libfcgi-perl libfcgi0ldbl libhtml-parser-perl libhtml-tagset-perl libhttp-date-perl libhttp-message-perl libio-html-perl liblwp-mediatypes-perl libmysqlclient24 libtimedate-perl liburi-perl mysql-client-9.0 mysql-client-core-9.0 mysql-common mysql-server-9.0 mysql-server-core-9.0 Suggested packages: libipc-sharedcache-perl mailx tinyca The following NEW packages will be installed: libaio1 libcgi-fast-perl libcgi-pm-perl libencode-locale-perl libevent-core-2.1-7 libfcgi-bin libfcgi-perl libfcgi0ldbl libhtml-parser-perl libhtml-tagset-perl libhttp-date-perl libhttp-message-perl libio-html-perl liblwp-mediatypes-perl libmysqlclient24 libtimedate-perl liburi-perl mysql-client-9.0 mysql-client-core-9.0 mysql-common mysql-server mysql-server-9.0 mysql-server-core-9.0 0 upgraded, 23 newly installed, 0 to remove and 0 not upgraded. Need to get 27.5 MB of archives. After this operation, 163 MB of additional disk space will be used. -
Verify the MySQL version.
console$ mysql --versionOutput:
mysql Ver 8.4.8-0ubuntu1 for Linux on x86_64 ((Ubuntu))
Run MySQL Secure Installation
MySQL includes a security script that helps you set a root password and remove insecure default settings. Run this script after the initial install to secure your database server.
-
Execute the MySQL secure installation script.
console$ sudo mysql_secure_installation -
Respond with the following values.
Would you like to setup VALIDATE PASSWORD component?

Press y|Y for Yes, any other key for No: Y

Please enter 0 = LOW, 1 = MEDIUM and 2 = STRONG: 2

Remove anonymous users? (Press y|Y for Yes, any other key for No): Y

Disallow root login remotely? (Press y|Y for Yes, any other key for No): Y

Remove test database and access to it? (Press y|Y for Yes, any other key for No): Y

Reload privilege tables now? (Press y|Y for Yes, any other key for No): Y
Output
All done!
Manage MySQL Service
MySQL runs as a system service on Ubuntu under the name mysql. You can manage this service using specific commands to start, stop, restart, and check the MySQL status. These commands ensure your MySQL server runs smoothly and make maintenance easier on your system.
Check MySQL Service Status
$ sudo systemctl status mysql
Output:
● mysql.service - MySQL Community Server
     Loaded: loaded (/usr/lib/systemd/system/mysql.service; enabled; preset: enabled)
     Active: active (running) since Sun 2026-04-26 10:20:30 UTC; 7min ago
 Invocation: 9ee1b20041d9460fbc36b9adaa96cf84
    Process: 34469 ExecStartPre=/usr/share/mysql/mysql-systemd-start pre (code=exited, status=0/SUCCESS)
   Main PID: 34479 (mysqld)
     Status: "Server is operational"
      Tasks: 36 (limit: 417)
     Memory: 259.4M (peak: 481.6M, swap: 273.5M, swap peak: 273.5M)
        CPU: 5.355s
     CGroup: /system.slice/mysql.service
             └─34479 /usr/sbin/mysqld
Press Ctrl + C to return to the console.
Enable MySQL to Start on Boot
$ sudo systemctl enable mysql
Output:
Synchronizing state of mysql.service with SysV service script with /usr/lib/systemd/systemd-sysv-install.
Executing: /usr/lib/systemd/systemd-sysv-install enable mysql
Start MySQL Service
$ sudo systemctl start mysql
Stop MySQL Service
$ sudo systemctl stop mysql
Restart MySQL Service
$ sudo systemctl restart mysql
Test the MySQL Database Server
In this section, you'll test the MySQL server by creating a sample database and table, inserting some data, and querying the table to ensure everything functions correctly.
-
Log in to MySQL with the
rootuser account.console$ sudo mysql -u root -p -
Press Enter when MySQL prompts you for a password because you've not set any password.
Output:
Enter password: Welcome to the MySQL monitor. Commands end with ; or \g. Your MySQL connection id is 15 Server version: 9.0.1-1ubuntu1 (Ubuntu) mysql> -
Create a new
company_dbdatabase.MySQLmysql> CREATE DATABASE company_db;Output:
Query OK, 1 row affected (0.01 sec) -
List all databases and ensure your new
company_dbdatabase appears in the list.MySQLmysql> SHOW DATABASES;Output:
+--------------------+ | Database | +--------------------+ | company_db | | information_schema | | mysql | | performance_schema | | sys | +--------------------+ 5 rows in set (0.00 sec) -
Switch to the new
company_dbdatabase.MySQLmysql> USE company_db;Output:
Database changed -
Create a sample
employeestable.MySQLmysql> CREATE TABLE employees ( employee_id INT AUTO_INCREMENT PRIMARY KEY, full_name VARCHAR(100), email VARCHAR(255) );Output:
Query OK, 0 rows affected (0.03 sec) -
Populate the
employeestable with sample records.MySQLmysql> INSERT INTO employees(full_name, email) VALUES ('MARY ROE', 'mary_roe@example.com'), ('JAY SMITH', 'jay_smith@example.com'), ('ANNA KIM', 'anna_kim@example.com');Output:
Query OK, 3 rows affected (0.01 sec) Records: 3 Duplicates: 0 Warnings: 0 -
Query the
employeestable to verify the records.MySQLmysql> SELECT employee_id, full_name, email FROM employees;Output:
MySQL+-------------+-----------+-----------------------+ | employee_id | full_name | email | +-------------+-----------+-----------------------+ | 1 | MARY ROE | mary_roe@example.com | | 2 | JAY SMITH | jay_smith@example.com | | 3 | ANNA KIM | anna_kim@example.com | +-------------+-----------+-----------------------+ 3 rows in set (0.00 sec) -
Exit from the MySQL prompt.
MySQLmysql> EXIT;Output:
Bye
Your MySQL database server is working as expected.
Conclusion
In this guide, you have installed MySQL on Ubuntu 26.04 using apt, secured the database server with the mysql_secure_installation script, and created a sample database with tables and records. Now that you have MySQL running, consider integrating the database with a web application using PHP with PDO or connect it with Python using the mysql-connector-python library to build data-driven applications.
