Author

Francis Ndungu
On this Page
How to Harden Ubuntu 26.04 Server for Maximum Security
07 May, 2026
Introduction
Server security is a critical responsibility when deploying systems accessible over the internet. Unprotected servers face constant scanning attempts, automated attacks, and exploitation of known vulnerabilities. A hardened server reduces these risks by eliminating unnecessary services, enforcing strong authentication, and implementing defense‑in‑depth strategies. Ubuntu 26.04 includes built‑in security tools like Uncomplicated Firewall (UFW), Fail2ban, and SSH configuration options that, when properly configured, create multiple layers of protection. Hardening your server also involves keeping software updated, using key‑based authentication, and monitoring for suspicious activity.
This guide shows you how to harden an Ubuntu 26.04 server by applying essential security configurations that protect against unauthorized access and common attack vectors.
Prerequisites
Before you start:
- Purchase an Ubuntu 26.04 VPS (Virtual Private Server) . If you don't have an Ubuntu VPS, sign up with Vultr and get upto $300 worth of free credit to test the Vultr platform.
-
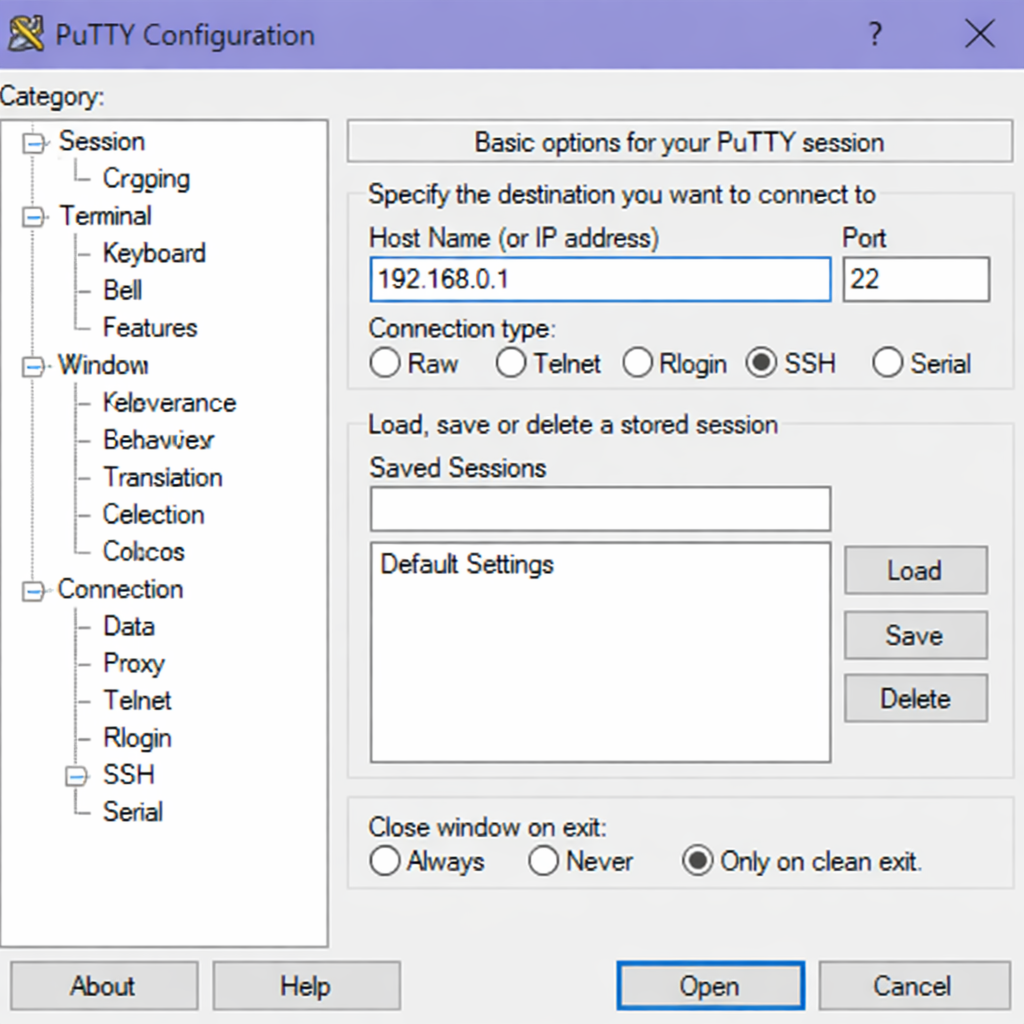
Connect to your server through SSH, replace
192.168.0.1with your VPS public IP address..-
Use PuTTY to connect to your VPS .
-
Run the following command in your shell.
console$ ssh root@192.168.0.1
-
Keep Your System Up to Date
Outdated packages contain known vulnerabilities that attackers actively scan for and exploit. Regular updates patch security holes, fix bugs, and ensure your system has the latest security features. Ubuntu provides automatic security updates, but manually verifying and applying updates gives you immediate control.
-
Refresh the package list to get information about available updates.
console$ apt update -
Upgrade all installed packages to their latest secure versions.
console$ apt dist-upgrade -y
Create a Non-Root User with Sudo Privileges
Working as the root user carries significant risk because a single mistake or compromised session gives an attacker full control. Creating a non‑root user with sudo access provides an administrative account that requires explicit privilege elevation for sensitive operations. This practice limits potential damage and creates an audit trail of administrative actions.
-
Create a new user account. Replace
secureadminwith your preferred username.console$ adduser secureadminOutput:
Adding user `secureadmin' ... Adding new group `secureadmin' (1000) ... Adding new user `secureadmin' (1000) with group `secureadmin' ... Creating home directory `/home/secureadmin' ... Copying files from `/etc/skel' ... New password: your_secure_password Retype new password: your_secure_password passwd: password updated successfully -
Add the new user to the sudo group.
console$ usermod -aG sudo secureadmin -
Verify the user has sudo privileges.
console$ getent group sudoOutput:
sudo:x:27:secureadmin
Generate and Configure SSH Key Authentication
Password authentication is vulnerable to brute‑force attacks, credential stuffing, and password guessing. SSH keys use cryptographic pairs consisting of a private key kept on your client machine and a public key placed on the server. This method provides stronger security because the private key never transmits over the network.
Generate an SSH Key Pair on Your Local Machine
Perform these steps on your local computer, not on the server.
On Linux or macOS:
$ ssh-keygen -t ed25519 -a 100 -C "your_email@example.com"
Output:
Generating public/private ed25519 key pair.
Enter file in which to save the key (/home/username/.ssh/id_ed25519): press Enter
Enter passphrase (empty for no passphrase): your_passphrase
Enter same passphrase again: your_passphrase
Your identification has been saved in /home/username/.ssh/id_ed25519
Your public key has been saved in /home/username/.ssh/id_ed25519.pub
On Windows using PowerShell or Command Prompt:
$ ssh-keygen -t ed25519 -a 100 -C "your_email@example.com"
Copy the Public Key to Your Server
-
Display your public key on the local machine.
console$ cat ~/.ssh/id_ed25519.pubOutput:
ssh-ed25519 AAAAC3NzaC1lZDI1NTE5AAAAIGx1234567890abcdefghijklmnopqrstuvwxyz your_email@example.com -
Copy the entire output line.
-
Create the
.sshdirectory on the server for your non‑root user.console$ mkdir -p /home/secureadmin/.ssh -
Create the authorized_keys file and paste your public key.
console$ echo "ssh-ed25519 AAAAC3NzaC1lZDI1NTE5AAAAIGx1234567890abcdefghijklmnopqrstuvwxyz your_email@example.com" >> /home/secureadmin/.ssh/authorized_keys -
Set correct permissions on the
.sshdirectory and files.console$ chmod 700 /home/secureadmin/.ssh $ chmod 600 /home/secureadmin/.ssh/authorized_keys $ chown -R secureadmin:secureadmin /home/secureadmin/.ssh
Disable Password Authentication and Remote Root Login
After configuring SSH keys, disabling password authentication forces all users to use key‑based access. Disabling remote root login ensures attackers cannot directly target the root account over SSH. These changes significantly reduce your server's attack surface.
-
Open the SSH daemon configuration file with a text editor.
console$ nano /etc/ssh/sshd_config -
Locate the
PermitRootLogindirective and change its value tono.INIPermitRootLogin no -
Locate the
PasswordAuthenticationdirective and change its value tono.INIPasswordAuthentication no -
Locate the
PubkeyAuthenticationdirective and ensure it is set toyes.INIPubkeyAuthentication yes -
Add a line to disable empty passwords if not already present.
INIPermitEmptyPasswords no -
Save and close the
/etc/ssh/sshd_configfile by pressing Ctrl + X, Y then Enter. -
Test the SSH configuration for syntax errors before restarting.
console$ sshd -t -
Restart the SSH service to apply the new configuration.
console$ systemctl restart sshd -
Open a new terminal and test connecting with your non‑root user and SSH key.
console$ ssh secureadmin@192.168.0.1 -
After confirming key‑based login works, close the root session.
console$ exit
Install and Configure UFW Firewall
UFW (Uncomplicated Firewall) provides a user‑friendly interface for managing iptables firewall rules. A properly configured firewall blocks all incoming traffic except for explicitly allowed services, preventing unauthorized access to network services running on your server.
-
Install UFW from the Ubuntu repository.
console$ sudo apt install -y ufw -
Set default policies to deny all incoming traffic and allow all outgoing traffic.
console$ sudo ufw default deny incoming $ sudo ufw default allow outgoingOutput:
Default incoming policy changed to 'deny' Default outgoing policy changed to 'allow' -
Allow SSH connections to prevent losing access to your server.
console$ sudo ufw allow sshOutput:
Rule added Rule added (v6) -
If you run a web server, allow HTTP and HTTPS traffic.
console$ sudo ufw allow 80/tcp $ sudo ufw allow 443/tcp -
Allow DNS resolution.
console$ sudo ufw allow 53/udp -
Enable the firewall.
console$ sudo ufw enableOutput:
Command may disrupt existing ssh connections. Proceed with operation (y|n)? y Firewall is active and enabled on system startup -
Check the firewall status and active rules.
console$ sudo ufw status verboseOutput:
Status: active
Logging: on (low)
Default: deny (incoming), allow (outgoing), deny (routed)
New profiles: skip

To                         Action      From
--                         ------      ----
22/tcp                     ALLOW IN    Anywhere
80/tcp                     ALLOW IN    Anywhere
443/tcp                    ALLOW IN    Anywhere
53/udp                     ALLOW IN    Anywhere
22/tcp (v6)                ALLOW IN    Anywhere (v6)
80/tcp (v6)                ALLOW IN    Anywhere (v6)
443/tcp (v6)               ALLOW IN    Anywhere (v6)
53/udp (v6)                ALLOW IN    Anywhere (v6)
Install and Configure Fail2ban
Fail2ban monitors system logs for repeated failed authentication attempts and temporarily blocks offending IP addresses. This tool protects against brute‑force attacks targeting SSH, web applications, and other services.
-
Install Fail2ban from the Ubuntu repository.
console$ sudo apt install -y fail2ban -
Create a local configuration file that overrides default settings without modifying the original.
console$ sudo nano /etc/fail2ban/jail.local -
Add the following configuration to protect SSH and set reasonable ban parameters.
INI[DEFAULT] # Ban IP addresses for 10 minutes bantime = 10m # Find failures within the last 10 minutes findtime = 10m # Ban after 3 failed attempts maxretry = 3 # Use iptables for banning banaction = iptables-multiport # Ignore your own IP address (replace with your static IP) ignoreip = 127.0.0.1/8 192.168.0.100 [sshd] enabled = true port = ssh filter = sshd logpath = /var/log/auth.log maxretry = 3 bantime = 30m -
Save and close the
/etc/fail2ban/jail.localfile. -
Restart Fail2ban to enable the new configuration.
console$ sudo systemctl restart fail2ban -
Enable Fail2ban to start automatically on system boot.
console$ sudo systemctl enable fail2ban -
Check Fail2ban status and see active jails.
console$ sudo fail2ban-client statusOutput:
Status |- Number of jail: 1 `- Jail list: sshd -
View the banned IP addresses for SSH.
console$ sudo fail2ban-client status sshdOutput:
Status for the jail: sshd
|- Filter
|  |- Currently failed: 0
|  |- Total failed:     0
|  `- File list:        /var/log/auth.log
`- Actions
   |- Currently banned: 0
   |- Total banned:     0
   `- Banned IP list:
Secure Shared Memory
Shared memory on Linux systems can be a vector for certain types of attacks. Mounting the /dev/shm partition with the noexec, nosuid, and nodev options prevents execution of malicious code from shared memory.
-
Open the filesystem table configuration file.
console$ sudo nano /etc/fstab -
Add the following line to the end of the file.
tmpfs /dev/shm tmpfs defaults,noexec,nosuid,nodev 0 0 -
Save and close the
/etc/fstabfile. -
Remount the shared memory partition with the new options.
console$ sudo mount -o remount /dev/shm -
Verify the new mount options.
console$ mount | grep /dev/shmOutput:
tmpfs on /dev/shm type tmpfs (rw,noexec,nosuid,nodev)
Test Your Server Hardening
After applying all security configurations, verify each component works correctly and your server remains accessible.
-
Test that password authentication fails for SSH.
console$ ssh -o PreferredAuthentications=password secureadmin@192.168.0.1Output:
Permission denied (publickey). -
Test that root cannot log in remotely.
console$ ssh root@192.168.0.1Output:
Permission denied (publickey). -
Verify the firewall blocks unapproved ports.
console$ sudo ufw status -
Test Fail2ban by intentionally failing SSH login three times from another machine.
console$ ssh fakeuser@192.168.0.1After three failures, the fourth attempt hangs or shows connection refused.
Conclusion
In this guide, you hardened your Ubuntu 26.04 server by applying a series of connected security steps. You began with automatic updates to keep the system patched. From there, you created a non‑root sudo user to limit exposure. You then secured access by enabling SSH key authentication and disabling password and root logins. Next, you controlled traffic with UFW firewall rules. To stop brute‑force attacks, you installed Fail2ban. Finally, you secured shared memory to prevent misuse. With a secure server, you can now go ahead and run your web application.
