Author

Francis Ndungu
On this Page
How to Deploy AutoGPT AI Agent on Ubuntu 26.04
07 May, 2026
Introduction
AutoGPT is an open‑source autonomous AI agent that uses large language models to accomplish complex tasks without continuous human input. Unlike standard chatbots that respond to individual prompts, AutoGPT can break down a high‑level goal into subtasks, execute Python code, browse the web, read and write files, and manage long‑term memory through vector databases. The agent operates iteratively, generating its own prompts and evaluating results until it completes the assigned objective. This capability makes AutoGPT suitable for research, content generation, data analysis, and automated software development tasks.
This tutorial teaches you how to deploy and configure AutoGPT on Ubuntu 26.04.
Prerequisites
Before you start:
- Purchase an Ubuntu 26.04 VPS (Virtual Private Server) . If you don't have an Ubuntu VPS, sign up with Vultr and get upto $300 worth of free credit to test the Vultr platform.
-
Connect to your server through SSH, replace
192.168.0.1with your VPS public IP address..-
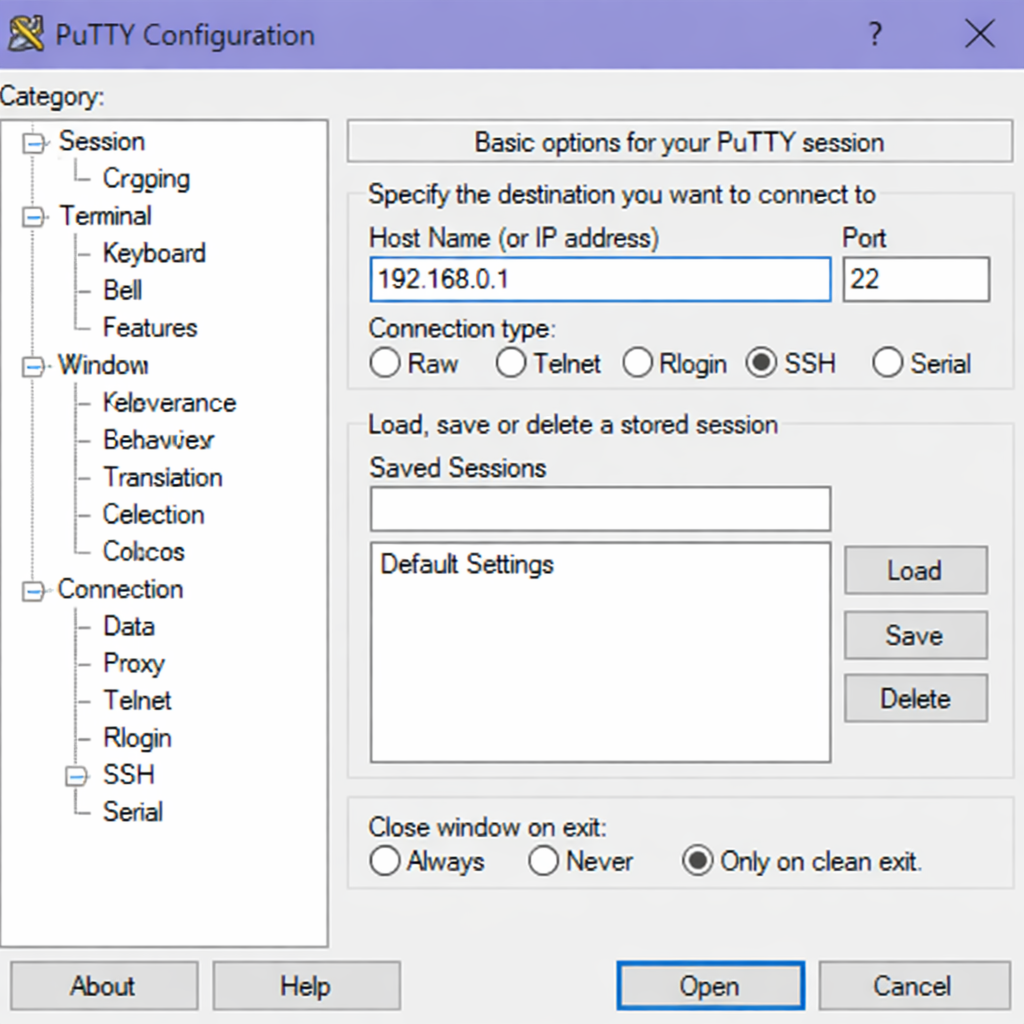
Use PuTTY to connect to your VPS .
-
Run the following command in your shell.
console$ ssh username@192.168.0.1
-
-
Create a non-root user with sudo privileges. Read our guide on How to Create a Non-Root Sudo User on Ubuntu 24.04. You'll use this user's account to run the commands in this guide.
- Obtain an API key from OpenAI, Anthropic, or another supported language model provider.
Install System Dependencies
AutoGPT requires Python 3.10 or newer, Git, and several system libraries to run correctly. This section covers installing these foundational packages.
-
Refresh your system package list to get the latest available versions.
console$ sudo apt update -
Upgrade all installed packages to their current secure versions.
console$ sudo apt upgrade -y -
Install Python 3, pip (Python package installer), Git, and developer tools.
console$ sudo apt install -y python3 python3-pip python3-venv git build-essentialOutput:
Reading package lists... Done Building dependency tree... Done Reading state information... Done The following additional packages will be installed: g++ gcc libpython3-dev python3-dev 0 upgraded, 12 newly installed, 0 to remove and 0 not upgraded. -
Verify the Python installation.
console$ python3 --versionOutput:
Python 3.12.3 -
Verify the Git installation.
console$ git --versionOutput:
git version 2.45.2
Clone the AutoGPT Repository
AutoGPT maintains its codebase on GitHub. Cloning the repository downloads the latest stable version to your server.
-
Navigate to your home directory.
console$ cd ~ -
Clone the AutoGPT repository from GitHub.
console$ git clone https://github.com/Significant-Gravitas/AutoGPT.gitOutput:
Cloning into 'AutoGPT'... remote: Enumerating objects: 50000, done. remote: Counting objects: 100% (50000/50000), done. remote: Compressing objects: 100% (15000/15000), done. remote: Total 50000 (delta 35000), reused 45000 (delta 30000) Receiving objects: 100% (50000/50000), 45.20 MiB | 10.25 MiB/s, done. Resolving deltas: 100% (35000/35000), done. -
Move into the cloned AutoGPT directory.
console$ cd AutoGPT
Create and Activate a Python Virtual Environment
Using a virtual environment isolates AutoGPT dependencies from other Python projects on your system. This practice prevents version conflicts and keeps the server organized.
-
Create a Python virtual environment inside the AutoGPT directory.
console$ python3 -m venv autogpt-env -
Activate the virtual environment.
console$ source autogpt-env/bin/activate -
Verify your active environment shows the virtual environment name in the shell prompt.
console(autogpt-env) $ which python3Output:
/home/username/AutoGPT/autogpt-env/bin/python3
Install AutoGPT and Dependencies
With the virtual environment active, install the AutoGPT package and its required Python libraries.
-
Install the AutoGPT package using pip.
console(autogpt-env) $ pip install autogptOutput:
Collecting autogpt Downloading autogpt-0.5.2-py3-none-any.whl (200 kB) Collecting langchain>=0.1.0 (from autogpt) Collecting chromadb>=0.4.22 (from autogpt) Collecting openai>=1.6.0 (from autogpt) Successfully installed autogpt-0.5.2 chromadb-0.5.0 langchain-0.2.5 openai-1.30.0 -
Verify the AutoGPT installation.
console(autogpt-env) $ autogpt --versionOutput:
autogpt, version 0.5.2
Configure AutoGPT with API Keys
AutoGPT needs access to a language model API to function. The configuration file stores your API keys and operational settings.
-
Create a new
.envconfiguration file using the nano text editor.console(autogpt-env) $ nano .env -
Add your OpenAI API key to the new
.envfile. Replaceyour_api_key_herewith your actual key.INIOPENAI_API_KEY=your_api_key_here -
Include the API key for Anthropic Claude if you prefer using that model.
INIANTHROPIC_API_KEY=your_anthropic_key_here -
Set the language model provider and model name. For OpenAI, use the following settings.
INILLM_PROVIDER=openai FAST_LLM_MODEL=gpt-3.5-turbo SMART_LLM_MODEL=gpt-4 -
Configure the workspace directory where AutoGPT stores generated files.
INIWORKSPACE_PATH=./autogpt_workspace -
Save and close the
.envfile by pressing Ctrl + X, then Y, then Enter.
Set Up the AutoGPT Workspace and Memory
AutoGPT writes files, stores logs, and maintains vector memory within specific directories. Creating these directories upfront prevents permission errors during execution.
-
Create the workspace directory for file operations.
console(autogpt-env) $ mkdir -p autogpt_workspace -
Create the directory for persistent memory storage.
console(autogpt-env) $ mkdir -p autogpt_data/memory -
Create the directory for execution logs.
console(autogpt-env) $ mkdir -p autogpt_data/logs -
Set appropriate permissions for these directories.
console(autogpt-env) $ chmod -R 755 autogpt_workspace autogpt_data
Configure Firewall for Optional Web Access
If AutoGPT needs to access external APIs or browse the web, the firewall must allow outbound connections. By default, Ubuntu restricts certain outbound traffic.
-
Allow outbound HTTP and HTTPS traffic.
console(autogpt-env) $ sudo ufw allow out 80/tcp -
Allow outbound HTTPS traffic.
console(autogpt-env) $ sudo ufw allow out 443/tcp -
Check the firewall status to verify the rules.
console(autogpt-env) $ sudo ufw statusOutput:
Status: active

To                         Action      From
--                         ------      ----
22/tcp                     ALLOW IN    Anywhere
80/tcp                     ALLOW OUT   Anywhere
443/tcp                    ALLOW OUT   Anywhere
Run AutoGPT in Interactive Mode
AutoGPT can run in interactive mode where you provide a goal and the agent works toward it while requesting human approval for certain actions.
-
Start AutoGPT in interactive mode with the default configuration.
console(autogpt-env) $ autogpt runOutput:
AutoGPT is starting... Loading configuration... Initializing memory... Welcome to AutoGPT! Enter the goal for the AI agent. -
Enter a goal when prompted. For example, to test the installation, provide a safe goal.
Create a text file named greeting.txt with the content "Hello from AutoGPT on Ubuntu 26.04" -
Review the agent reasoning process. AutoGPT outputs each step as it plans, executes, and evaluates.
Output:
THOUGHTS: I need to create a text file with specific content. The workspace directory is available for file operations. REASONING: AutoGPT has workspace access through the configured WORKSPACE_PATH. I can use the write_file command. PLAN: - Use write_file command with path autogpt_workspace/greeting.txt - Set content to "Hello from AutoGPT on Ubuntu 26.04" - Confirm file creation CRITICISM: None needed for this basic operation. COMMANDS: - write_file("autogpt_workspace/greeting.txt", "Hello from AutoGPT on Ubuntu 26.04") -
Type
yand press Enter when AutoGPT asks for approval to execute commands.Output:
Execute command write_file? (y/n): y Command executed successfully. File created at autogpt_workspace/greeting.txt -
Press Ctrl + C to stop AutoGPT when you finish testing.
Run AutoGPT in Fully Autonomous Mode
AutoGPT can operate without requesting human approvals for each action. This mode suits batch processing or well‑defined tasks but requires caution.
-
Create a new configuration file for autonomous mode.
console(autogpt-env) $ nano .env_autonomous -
Add configuration settings that bypass approval requests.
INIOPENAI_API_KEY=your_api_key_here EXECUTE_LOCAL_COMMANDS=True AUTHORISE_COMMANDS=True AUTHORISE_WEB_BROWSING=True -
Save and close the
.env_autonomousfile by pressing Ctrl + X, then Y, then Enter. -
Start AutoGPT with the autonomous configuration file and provide a goal.
console(autogpt-env) $ autogpt run --env-file .env_autonomous --goal "Research the latest Python web frameworks and save a summary to a file called python_frameworks.txt" -
Monitor the output as AutoGPT performs web searches, reads documentation, and writes the summary without pausing for approvals.
Create a Systemd Service for AutoGPT
Running AutoGPT as a systemd service ensures the agent can start automatically after system reboots and continue running in the background.
-
Create a new systemd service file using the nano text editor.
console(autogpt-env) $ sudo nano /etc/systemd/system/autogpt.service -
Add the service configuration to the new
autogpt.servicefile. Replaceusernamewith your actual username.INI[Unit] Description=AutoGPT AI Agent Service After=network.target [Service] Type=simple User=username WorkingDirectory=/home/username/AutoGPT Environment="PATH=/home/username/AutoGPT/autogpt-env/bin" ExecStart=/home/username/AutoGPT/autogpt-env/bin/autogpt run --continuous Restart=on-failure RestartSec=10 [Install] WantedBy=multi-user.target -
Save and close the
/etc/systemd/system/autogpt.servicefile by pressing Ctrl + X, then Y, then Enter. -
Reload the systemd manager to recognize the new service.
console(autogpt-env) $ sudo systemctl daemon-reload -
Enable the AutoGPT service to start automatically at boot.
console(autogpt-env) $ sudo systemctl enable autogptOutput:
Created symlink /etc/systemd/system/multi-user.target.wants/autogpt.service → /etc/systemd/system/autogpt.service. -
Start the AutoGPT service.
console(autogpt-env) $ sudo systemctl start autogpt -
Check the service status to confirm AutoGPT runs correctly.
console(autogpt-env) $ sudo systemctl status autogptOutput:
● autogpt.service - AutoGPT AI Agent Service Loaded: loaded (/etc/systemd/system/autogpt.service; enabled; preset: enabled) Active: active (running) since Mon 2026-05-04 14:32:15 UTC; 45s ago Main PID: 12456 (python3) Tasks: 8 (limit: 1024) Memory: 156.4M CPU: 12.345s CGroup: /system.slice/autogpt.service └─12456 /home/username/AutoGPT/autogpt-env/bin/python3 /home/username/AutoGPT/autogpt-env/bin/autogpt run --continuous -
View the AutoGPT logs to monitor the agent activity.
console(autogpt-env) $ sudo journalctl -u autogpt -f
Press Ctrl + C to exit the log viewer.
Test AutoGPT with a Real Task
Validate your complete AutoGPT deployment by assigning a practical task that uses multiple capabilities.
-
Deactivate the virtual environment if still active.
console(autogpt-env) $ deactivate -
Start a new shell session and run AutoGPT with a research task.
console$ cd ~/AutoGPT -
Activate the virtual environment.
console$ source autogpt-env/bin/activate -
Run AutoGPT with a goal that tests file reading, writing, and reasoning.
console(autogpt-env) $ autogpt run --goal "Read the file autogpt_workspace/greeting.txt if it exists. Then create a new file called summary.txt that describes what AutoGPT can do based on the README.md file in the current directory." -
Observe the agent reasoning process.
Output:
THOUGHTS: I need to read an existing file and analyze the README documentation. REASONING: This task requires file system access and text analysis capabilities. PLAN: - Check if greeting.txt exists in workspace - Read README.md from current directory - Extract key AutoGPT features from README content - Write summary to summary.txt in workspace COMMANDS: - read_file("autogpt_workspace/greeting.txt") - read_file("README.md") - write_file("autogpt_workspace/summary.txt", extracted_summary) -
Type
yto approve each command as AutoGPT executes the task.
Conclusion
In this guide, you have deployed AutoGPT on Ubuntu 26.04 by installing system dependencies, cloning the repository, creating a Python virtual environment, configuring API keys, and setting up a systemd service for persistent operation. You also tested the agent with interactive and autonomous tasks, confirming the agent can read files, write content, and reason through multi‑step objectives. Now that AutoGPT runs on your server, consider integrating it with external tools like Zapier or custom webhooks, or explore advanced memory configurations using vector databases such as Chroma or Pinecone for long‑running projects.
